West System Epoxy / Precision Board Test Report
In order to assist Precision Board users everywhere, Coastal Enterprises has partnered with leading epoxy manufacturer West System to conduct physical testing on Precision Board HDU bonded with their Six10 Epoxy to determine the bond strength of several configurations and densities. The tests also included testing the pull strength of various fasteners potted into Precision Board with the same adhesive.
All testing was done to destruction, “Destruction Testing”, to show at what pressure load the bond line failed and also to show where the failure occurred. The pictures show dramatic results of this testing.
This project report contains testing information from Bruce Niederer, Technical Advisor/Chemist at West System, using Precision Board PBLT-10, PBLT-15, and PBLT-30.
Coastal Enterprises offers free technical support and we are happy to answer any questions you may have. Please call us at: (800) 845-0745.
I designed a test protocol that would examine the effectiveness of our typical hardware bonding techniques using Six10® Adhesive. I chose Six10 primarily because of its ease of application which I believe would be a benefit in a sign shop. I would note that using our West System ® 105 Resin with any 200 Series Hardener thickened using 406 Colloidal Silica® filler would achieve the same results and many shops keep these products on their work bench.
Each test sample consisted of 4 test sites:
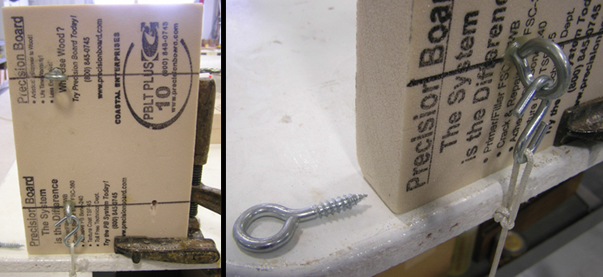
- A lag eye-screw in a proper sized pilot hole tested in shear.
- The same type lag eye-screw embedded in an over-sized hole using Six10 tested in shear.
- An eyebolt with 2 nuts embedded in an oversized hole using Six10 tested in shear.
- An eyebolt with 2 nuts embedded in an oversized hole using Six10 loaded in tension and pulled with our test fixture to determine a measured value for pull-out strength.
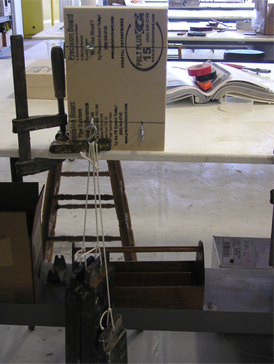
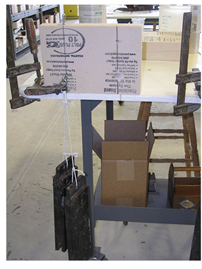
To test the samples shear, I hung 20 lb. weights, a simple dead weight load, one at a time until the HDU board failed. The following series of photos show how this work was done.
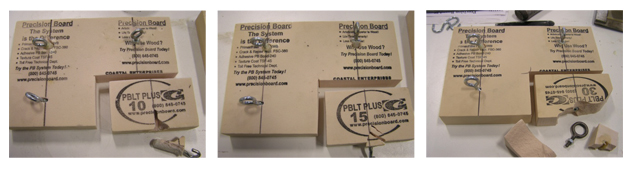
10 lb. board with lag eye-screw failed immediately with only a proper pilot hole.
The 15 lb. board with a pilot hole/no 610 lag eye-screw failed at 40 lbs. while the 30 lb. board only showed minor failure as seen above.
30 lb. board with a 40 lb. dead load shows only minor failure with just a proper pilot hole. Under a 60 lb. load the eye-screw failed but did not pull out completely.
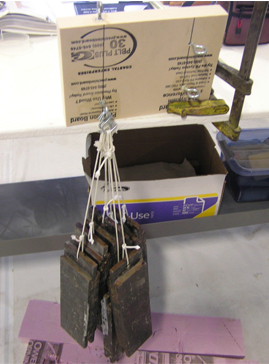
For the next round of shear testing I moved to the lag eye-screw in a Six10 annulus and began loading on successive 20 lb. weights.
The photos above show the epoxy annulus and the lag eye-screw in the 10 lb. board holding at a 20 lb. load. It failed immediately when I added another 20 lb. weight.
The 15 lb. board held 60 lbs. load and failed immediately when another 20 lb. weight was added.
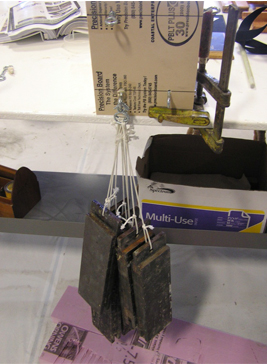
The 30 lb. board easily held a 140 lb. load and failed shortly after loading and additional 20 lbs. for a total of 160 lbs. dead load. Very impressive.[/one_half_last][divider]
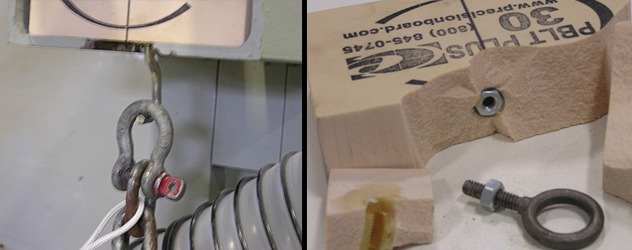
Next I changed it up a bit and employed what we term as advanced hardware bonding. The idea is to use a bolt and nut set up which is very good when drilling a blind hole.
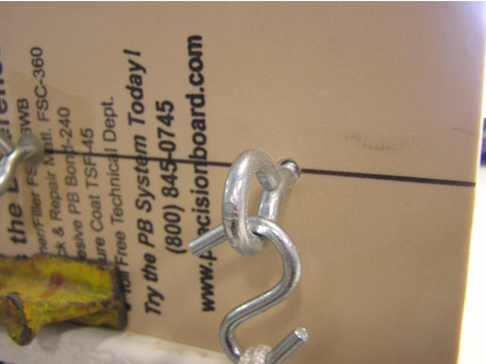
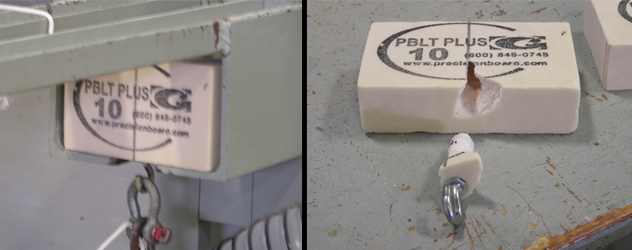
The cast eyebolt on bottom of the picture o n the left illustrates the set up I used. I drilled a hole the diameter of the outside points on the nut such that the assembly can be pushed into the prefilled hole and the nuts center everything. For the 10 and 15 lb. board I used a forged eyehook instead to the cast eyebolt shown here. The strength of the 30 lb. board forced me to install the cast eyebolt shown here – the forged eyehook simply straightened the metal out without even taxing the epoxy bond.
The technique is – with the nuts off, spray the threads with Pam® Cooking spray off to the side on a paper towel, thread the nuts on as shown, fill the pre-drilled hole about ½ full with Six10 and coat the exposed threads between the nuts too, then push the assembly into the hole. Clean up any squeeze out and let it cure.
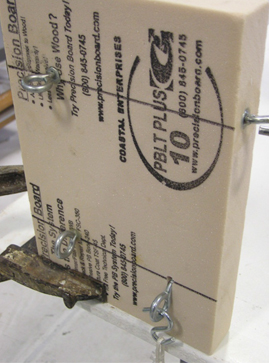
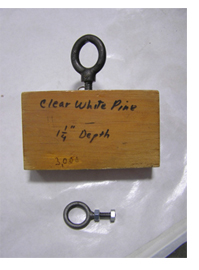
As an aside, the pine block in the photo has just such a set up and because the threads were coated the eyebolt goes in and out – no problem. This particular block is a prop we use when teaching hardware bonding and is over 20 years old! It has been loaded in our extraction frame 40 or more times with a direct load close to 2 tons! And it’s still going strong.
The picture on the right shows the 10 lb. board holding 40 lbs. using the technique I just described. Recall that the lag screw set up failed under a 40 lb. load. It did fail under a 60 lb. load. Quite good for a 10 lb. board.
Although I somehow didn’t take a picture of the 15 lb. board loaded using the eyebolt, the result was very impressive. The 15 lb. board held 80 lbs. and failed at 100 lbs! For a relatively low density foam that is outstanding.
As good as the 15 lb. board performed,the 30 lb. board surpassed all my expectations. Shown here is the 30 lb. board holding 160 lbs. – which is all the weight I had on hand! No failure at all.
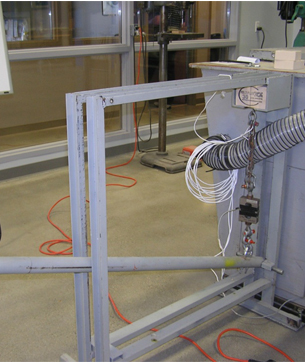
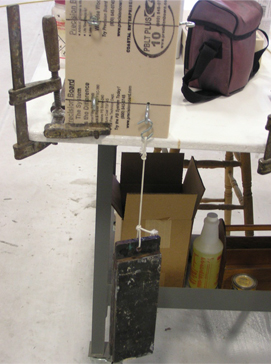
For the final phase of testing I again installed an eyebolt with the double nut set up and cut out a corner to load in our extraction frame as shown above. The load cell is attached to a digital readout so we can identify the tensile pull out strength of each density Precision Board.
The 10 lb. board failed under the load from the lever arm itself which exerts a load of 193 lbs. Nearly a 200 lb. load with low density material is still very good and fails a significant amount of the HDU foam.

These pictures show the 15 lb. board in the test frame and after failure. It took 396 lbs. of direct tensile load to break this block.
I my first attempt to pull a forged eyebolt from the 30 lb. block at 496 lbs. direct tensile load the eyebolt straightened out. I didn’t spray any Pam on these threads so I couldn’t remove the eyebolt. I remounted another assembly with an eyebolt and 2 nuts but this time I used a cast eyebolt because it would be much stronger than a forged one.
The above photo on the right shows how the 30 lb. block virtually exploded when finally pressed to failure at a whopping 720 lbs! Recall that I sprayed these threads so the fastener would have threaded easily in and out.
To summarize, I believe I have shown sufficient test results to say the Precision Board can be used for hanging signs and wall mounted signs with great confidence and success using any density board and any of the epoxy techniques I have outlined in this report. Here’s one final look at all the failures: