It is one thing to draw something cool and quite another to realise it as a full 3D object, often larger than life. In between there are many steps required to create it, safe and legal. I often get asked just what is involved. Most often it is not a difficult process although there can be many steps. The key is to have a clear vision of where you are going before you start the journey. Experience helps.
Our new house is a great example. The design is fanciful, somewhat unusual. It is pretty easy to come up with the concept. I’ll show our front window area as an example.
The actual building ended up a little taller but we have stuck with the basic design. The drawings done by the draftsman which we submitted to city hall for permit were pretty basic, the walls straight and they showed a basic vaulted truss. Notes on the drawing stated that there would also be some structural steel and it would be engineered. Most importantly the structure has to be neatly tucked inside the features we build. As I drew my first drawing I kept in mind just what it would take to build it. Experience comes in handy and the more the better!
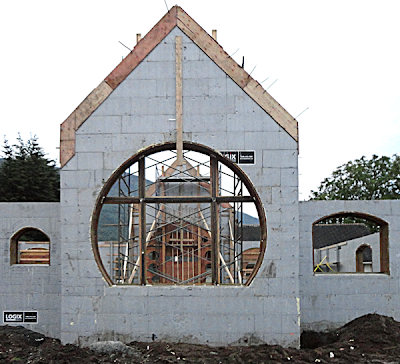
The window frame was built from welded steel and laminated plywood. It was built around the window patterns we created on our MultiCam. I’ve shown that process in previous posts. The window frames were laminated up around those plywood patterns with many layers of treated plywood and inserted into the ICF forms. The engineer specified the reinforcing steel that was put into the concrete that was poured into the walls. Once the house walls were up the building looked like this a far cry from what it would look like when we were done. After the windows are fitted into place we will route and carve superbely detailed trim from 30 lb Precision Board. Detailed fiberglass reinforced concrete will be sculpted to form faux wood and rock work over the entire surface.
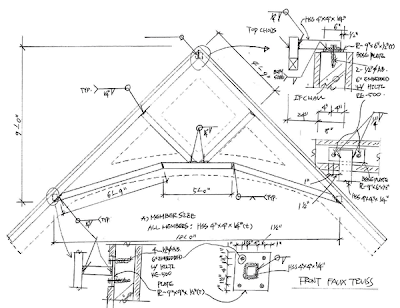
But I’m getting a little ahead of myself… The beam work was the next item on the adjenda. It was more decorative than functional but required engineered structural steel none the less. I did up a drawing that explained what I had in mind to our engineer. He added many notes and small details showing how heavy the steel should be and how it would all go together. I didn’t really get any surprises here but the engineer’s notes and stamp made it official. The general rule of thumb is that if you can walk over or under it engineering is most likely required.
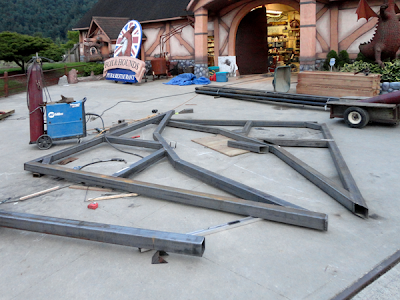
Once I had the engineered drawings in hand it was time to break out the welder and get to fabricating some heavy steel. I built two of the trusses – one for the front of the house and one for the rear porch.
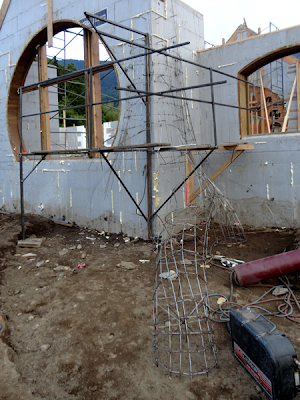
While I was busy back at the shop Peter had a second welder humming out front. He was building the armature for the first of the giant trees with knarly roots that would flank each side. We do this work with 1/4″ pencil rod which will be covered with galvanized steel lath and then a heavy coat of fiberglass reinforced concrete.
We’ll sculpt that to look a whole lot like massive and ancient trees that will flank the round window. The final step will be to paint it up to look totally believeable – just like the drawing we came up with back in April.
Stay tuned to watch this dream unfold.
-grampa dan
Published with permission from precisionboard.blogspot.com. Source.


