I received an email this morning from Jim in Minnesota. While I could easily create and sell a file to him that would work I think it makes for a great tutorial and learning piece.
‘Currently, we are restoring a 1941 English Country stone house for my wife Pat and me. The garage will be Spancrete with a workshop below. I want to pour the walls with a pattern. I want to make form liners on my CNC machine… unless you have a better idea??
I want distressed, aged, barn siding as the look for the form liners. Probably random V Grooved planks, so that I can make the vertical seams between form liners blend in on V-Grooves.
Can I buy this type of pattern from you? I just don’t have the Enroute experience to create some all on my own.
I have some old sheets of 1/4″ acrylic that I think might make great form liners… but also looking for ideas as to another material… just in case the 1/4″ is too thin or I don’t have enough. I’m an old wood guy, but your blogs speak of foam products… possibly a 3/8″ or 1/2″ something??’
1/4″ acrylic might be a little thin to create textured panels. They would certainly be very fragile to handle as they would be 1/8″ thick and possible thinner in places when you were done. The textures you ended up with would be very shallow as well and perhaps not what you are looking for. HDU would most likely be a little too rich for this project. If you could keep the forms dry during construction or put the liners on at the very last moment MDF might work. It would certainly be reasonable. They would only be good for one use however. Creating one pattern and then creating molds by casting might be another alternative but in my experience molding rubbers are pricey as well.
Anyway here’s a tutorial of how I would tackle this project.
I first created a rectangular vector. Mine measures 48″ wide by 96″ tall. If you were routing the panels from 4′ x 8′ stock you might want to make the file slightly oversize so the pattern went all the way to the edges.
I then created a flat relief that was 0.25″ (1/4″) thick.
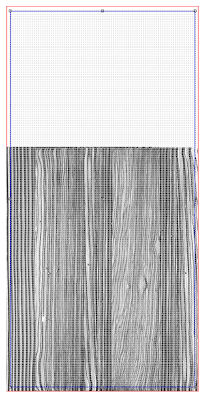
I imported the bitmap from my TEXTURE MAGIC collection. This bitmap was created by modifying and tweaking a photograph of a laminated and sandblasted redwood panel. The bitmap file is 12″ x 8.5″ at 300 DPI which allows it to be enlarged many times to get a good routing file of woodgrain. EnRoute opens the file to the width of the bounding box by default.
I then stretched it vertically to cover my 4′ x 8′ panel.
I then selected both the relief and bitmap which allows me to open the apply textures tab. I selected the ADD TO function and then put in a value of 0.2″ This means that the white areas of the bitmap will rise 0.2″ The black will do nothing and the greys will do something in-between depending on their color value.
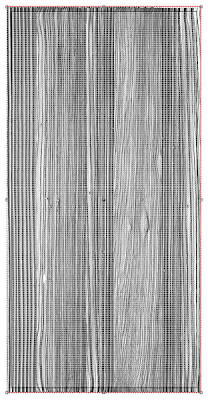
When I hit apply the program generates the texture automatically. This is a pretty good sized file and it may take a while depending on the age and speed of your computer.
To create the V-grooves I created four narrow (0.3″ wide) rectangle vectors and positioned them on top of the joints in the board patterns,
Then I used the V-goove tool to carve then into the relief by subtracting them from the base relief. This keeps the woodgrain pattern in the grooves.
In the front view you can see the grooves more clearly.
I would tool path the file using a 1/8″ ball nose bit with a 75 – 80 % overlap. You could use a larger bit but you would loose some detail in the process.Being this large it certainly wouldn’t be a quick file to run, most likely in the 12 – 16 hour range on my MultiCam which I have tuned to run pretty quick on this kind of file. Turning out enough panels to create molds for an entire workshop would keep the machine busy for quite some time. The good news is that you could be elsewhere doing something else in that time.
-dan
Published with permission from precisionboard.blogspot.com. Source.


