I’ve been asked to include tool paths in this series of posts. I will be including feeds and speeds but it is important to remember that all machines are not created equal. There are many variables. Motors on various routers are of different power and speeds. Servo or stepper motors, and sturdiness of the machine in general determine the speed at which we can run our files. Typically the reliefs I create have a lot of texture, with many sudden directional changes as it work and need to be programmed. The parameters that the machine is programmed to react to these changes of direction also effect the speed at which we can program our files. With all that said let me show you how I tool path my files.
On most occasions I cut these types of files with two only two tools using two passes. If the piece is thicker than the usual 1.5″ – 2″ I program more passes (3/4″ – 1″ per pass) with the big bit and a single pass with the fine.
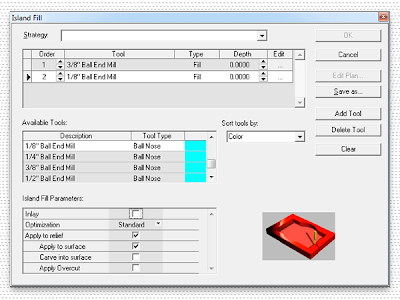
I opened the island fill window. I have found that by using the island fill on these kinds of too patching I break fewer bits. This means the cuts start in the center of the piece and work outwards to the edge. I selected the 3/8″ ball nose bit first and then the 1/8″ ball nose bit. The 1/8″ bit I use is a tapered bit (1/4″ shaft down to 1/8″ at the tip) it has a cutting edge that is 1.5″ long.
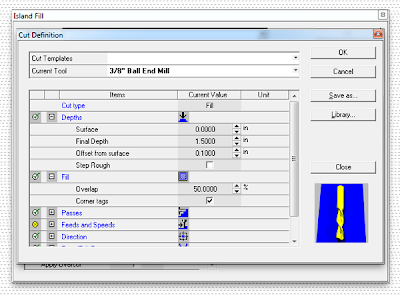
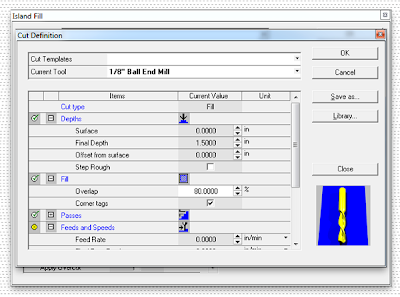
Then I edit the larger bit perimeters first starting at the top of the form and working my way down. The depth is set first (the thickness of the substrate) in this case it is 1.5″ The next up we set the offset. This means the rough cut does not go any closer to the final routed surface than 0.1″ The over lap is left at the default of 50%
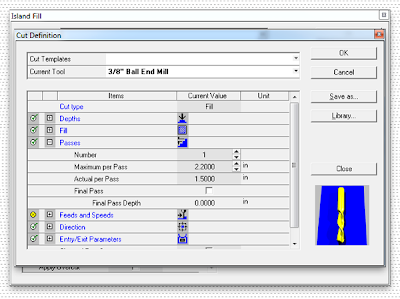
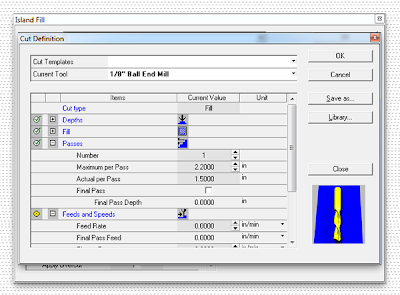
As we work out way down the next item is number of passes. In this case I leave it at one pass.
Below that you can see the parameters that were set for the bits in another menu… the bit measurements are set at 2.2″ (I actually lied to the machine so I can cut materials up to 2″ in one pass, despite the cutting edge of the boot being only 1.5″ I did the same thing with the small bit)
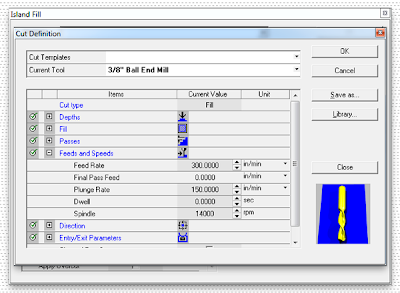
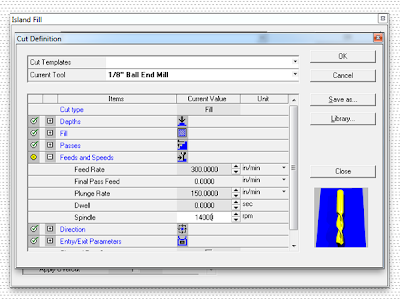
Then we are down the menu to feeds and speeds. I know my router can handle 300 inches per minute for the fed rate. The plunge rate is set at roughly half for my router – 150 inches per minute. Spindle speed was set at 14,000 RPM. 30 lb Precision Board cuts smoothly at this speed with the feeds I use. I hit OK and then this tool was complete.
The final pass with the 1/8″ ball nose bit was next. I worked through the parameters in the same manner as the big bit with a couple of changes. Depth was still 1.5 inches. This time there was no offset. Overlap was set at 80%. For Precision board this gives a pretty nice finish.
In the passes menu I make sure we can do the fine pass in one go. Because the machine thinks the bit is longer than it really is it which is no problem because we would really only be removing 1/10 of an inch of material that had not been removed with the big bit in the rough pass.
Feeds and speeds were next and were set similar to the big bit. Then we were done.
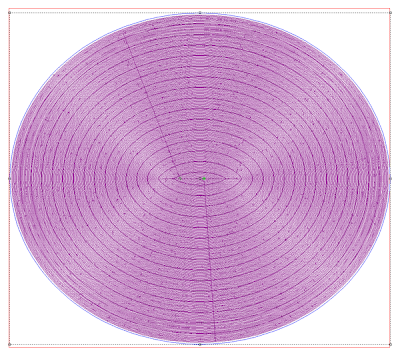
It only took a few seconds for EnRoute to generate the tool paths and the file looked like this when it was done.
