The first file I created for the WhistlePunk Hollow Adventure Golf Project was the primary sign. It will be reproduced in various scales and so I kept this in mind as I designed the file. This primarily applied to widths of borders and such. The largest sign was designed to fit onto a 4’x8′ piece of Precision Board. The whistle file will be built separately which I will cover in the next post. I built two versions of the sign, one with ‘Adventure Golf’ along the bottom and one without.
The first task was to distort the bitmap I would use to add texture. The bitmap is from the Texture Magic Collection and is called DRIFTWOOD. I distorted the bitmap in PhotoShop, then duplicated it and positioned the second copy above the first. I did a little blending with the eraser tool and then merged the two layers together and saved the file to import into EnRoute
I forgot to grab a screen capture of the vectors but the lettering was created from scratch in Illustrator. The rest of the vectors were done in EnRoute. I stretched out the bitmap a bit to match the arc I wanted for the sign. Then I quickly drew the vector outline of the sign using the bitmap as a guide. The top oval was built separately as were the two part circles on each side.
The jigsaw tool made building the flat bottom oval an instantly quick procedure.
I used the outline tool to add the letter borders around the lettering. Circles would become the fastening dowels to ‘hold’ the sign in place. I also added the bottom panel for one version of the sign.
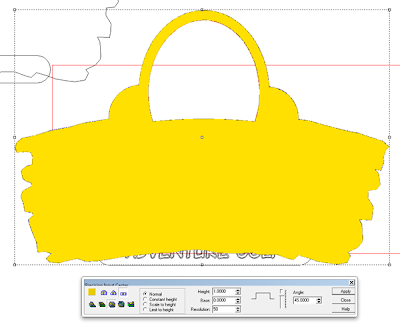
The first step was to create a flat relief with a 1″ height.
Then I applied the warped driftwood bitmap. Because the sign is a good size and I wanted a deep woodgrain the bitmap value was increased to 0.25″ high. I then used the sculpting tool to deepen the texture of the relief.
The sign is to be built in layers, I applied the driftwood bitmap texture to the background of the holed piece of the sign.
The biggest lettering outline was created as a new flat relief. It was then merged with the base relief (Sign) Then I selected the lettering outline and the base relief to modify the relief by adding the letters. Once more I wanted things a little higher than what I do most of the time and so raised the lettering 1/4″.
The last step to this part is the adding of the sunken center of the lettering.
To create the bevelled dowels I used the Bevel create relief command… but limited the height to create the bevel,
I applied a sandblasted woodgrain texture bitmap.
The the various reliefs were positioned vertically (in the front view) and merged highest.
This completed one of the files. For the second one I would add the ‘ADVENUTRE GOLF’ panel. The panel is a simple domed relief. I added the ‘splotches’ bitmap (from the
TEXTURE MAGIC Collection) I inserted a small num
ber 0.1″ to keep the texture s
ubtle.
Then this relief was modified two time, first to add the letter border and then to add the lettering.
The reliefs were combined and the file was ready to go.
The sign(s) will be routed on our MultiCam from 30 lb Precision Board.
Next up is the whistle.
-dan


