Designing, routing and painting name plates is a wonderful exercise in many ways. The first few are pretty easy. We all have ideas in our heads. But with with each workshop (times two) there are often more than went name plaques to create. All need to be different. The truth is that I have go-to styles that I repeat each year but even these are different as I don’t do the same names with the same fonts on the shame shape plaque with the same background textures. Colors too are not repeated. Through the years we’ve been hosting these workshops I’ve designed well over two hundred name plaques.
I find it a great way to brush up on my EnRoute skills before getting into teaching at the workshops. The painters always enjoy experimenting and our guests always seem to have endless questions as to how it was all accomplished. In short it is a learning exercise of great value for all.
Some plaques are pretty simple with only a few steps and procedures while others are quite complex. As I sit down to design my mind always is thinking new ways to challenge myself, and then to sit down with the program to figure out how I will get the effect I desire. I’ve yet to be stumped although I often have to try a few things to figure it out. Often it is the little details that are the most challenging.
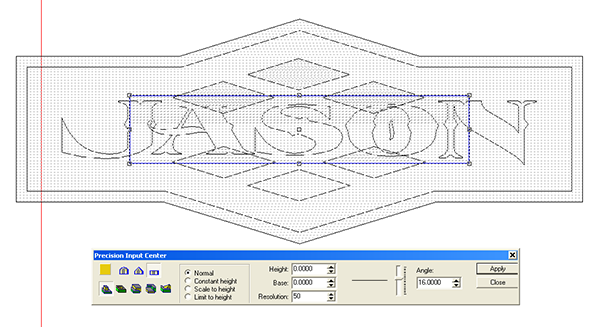
Jason’s plaque was just such a project. As usual we started with the vectors. In such a design the name and graphic elements determine the final shape of the plaque. The diamonds that go into the lettering will ultimately be cut in half horizontally but need to be full to get the profile I desire. They will be trimmed after I create them as beveled reliefs.
An outline around the letters was the first step created with the offset tool.
Then I created a similar sized outline around the diamonds.
To trim the diamond outline I first moved it to the side. Then I created a rectangle that was sized to cut off the right amount. This was drawn with the diamonds in place to better judge the spacing I needed. I then moved the diamonds out of the way and used the jigsaw tool to get the shape created by the diamond borders and the rectangle.
This are the resulting shapes.
I then moved everything back into position and created the outside shape I desired for the panel. The big diamond and the rectangle were combined.
I then used the point edit tool to delete the points on each side of the border. Lastly I created an offset line around the outside edge to create the border for the plaque.
Now we were ready to begin creating the reliefs, starting with a flat surface 0.7″ tall.
I then dropped the middle of the plaque but used the lettering and diamond border as a mask.
I then created a zero height relief of a properly sized rectangle. The diamonds were then MERGED LOWEST with this rectangle, effectively cutting them off. This has to be done one diamond at a time.
The diamonds were then positioned vertically (in the front view)
before MERGING HIGHEST with the base relief. They still appear to be full diamonds in the top view which they are, except the middle ones have the center portions as zero height reliefs
Lastly the lettering was formed using the constant height function.


