Designing and building a theme park is a lot of fun, especially if you get to control all aspects of the design. The rides are being manufactured by a company in Italy but they allowed me to help with the design to help the ride fit into the theme of the park. Unless we want to spend a great deal of our customer’s money the changes are limited to cosmetic items alone. In this case we went a little further.
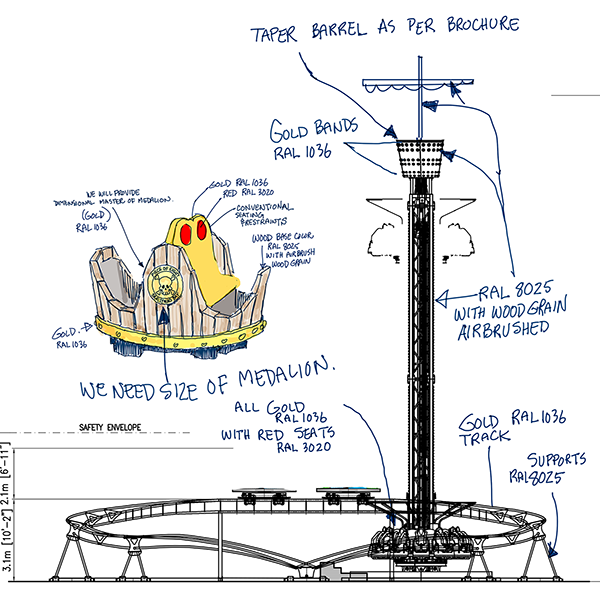
To make the ride(s) more exciting and to maximize the space available we tucked two rides together. The concern was the safety ride envelope of each ride. This meant we had to have one end of the figure eight ride (spinning coater) enlarged slightly. Our theme in the park is Pirates so we added some theme work to the rides as well. For the spinning drop ride tower we added a crow’s nest and a mast at the top- an easy addition. I also specified the colours we wanted.
The spinning coaster we went a little further. We asked the ride manufacturer to redesign the ride cars to look like the bottom portion of a barrel. Stock seats will fit inside.
After I sent off the artwork I got back a proof from the factory to confirm our choices.
We’ll also build a small mountain peak inside the second loop to further bring the theme into this area. The ride will be raised substantially to add excitement and also to make it more visible as you approach the park. The very tall rock structure to the right will be Monkey Skull Rock, a world class climbing wall with a fifty foot jump out of the mouth. It will offer a cable controlled descent for those brave enough to try it.
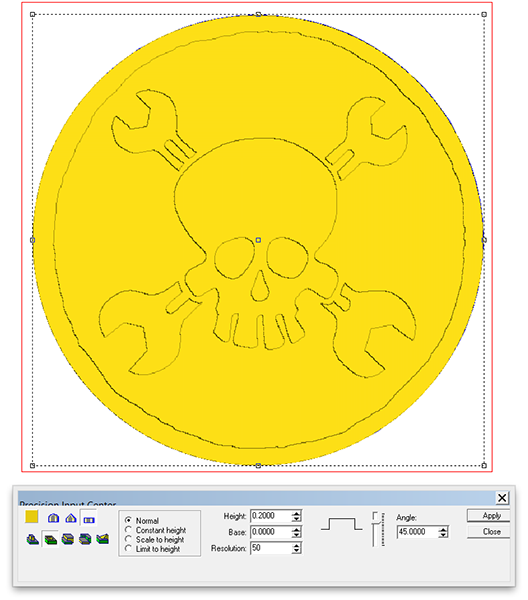
Today’s task was to design the gold medallion that will be mounted to the side of each car on the spinning coaster which is name Pieces of Eight. It features the pirate emblem we are using extensively through the park. The design is simple and is to be routed as a simple cutout – with a cool texture of course. We’ll route it from 30 lb Precision Board. After it is routed we’ll do a little hand sculpting on the skull to make it even more 3D.
We started with a flat relief 1.5″ thick.
I then dropped the centre portion of the coin around the skull 0.2″
I then added a texture using our blotches bitmap. Notice how far it was enlarged. I wanted the coin to have a subtle texture and not just look pitted.
As quick as that it was ready for tool pathing. I used a 1/8″ ball nose bit with an 80% overlap.
We’ll make two copies of the piece. One will be sent to Italy to be a master for the mold they will make to cast the eight pieces they will need for the ride. The other piece we make will be painted up real nice and then mounted to our display wall in the shop.
It’s always an exciting day to see the giant rides pulled out of the containers and set into position. Then comes the first test rides by our crew! Stay tuned to see how it turns out…
-dan
Published with permission from precisionboard.blogspot.com. Source.


