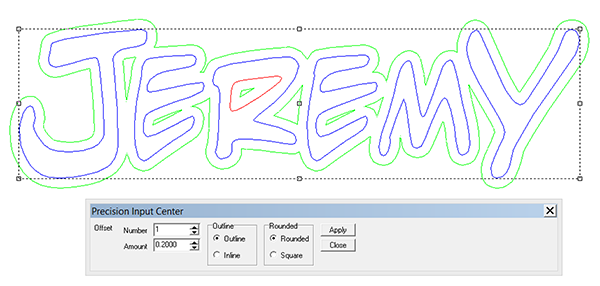
There are certain tools I love to use in EnRoute to get the results we need. One is the outline or offset tool. On pretty much every name plaque I create (and there have been hundreds) I like to have a border around the lettering. I do it on most of our signs as well. This border is generally painted a contrasting color to the lettering and it makes the letters stand out.
The same tool was used to create the offset border on the local shaped plaque.
To use EnRoute and create fancy reliefs one has to understand how it works, especially in order to do certain things on specific areas of the surface. The colors of the lines gives us an important clue about what is going to happen. In the case below the blue line is the container while the red line is the mask. This means everything inside the blue will do whatever you wish and everything in the red will stay blank.
Here we have the lettering border selected too. In this case the same thing that happened on the border would also happen inside the lettering border save for the areas defined by the red areas inside.
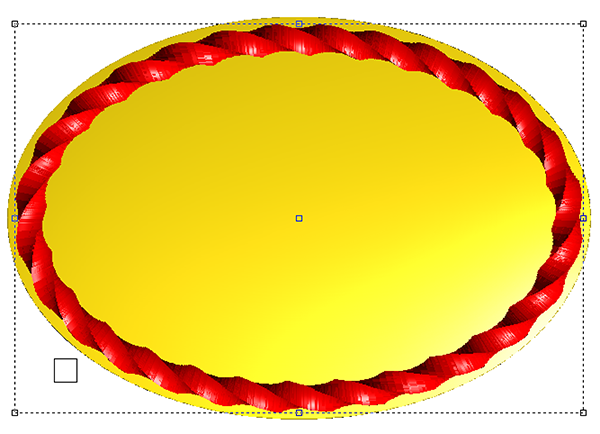
To begin I created a domed relief. Then I selected the inside oval vector and small square to extrude the twisted border and create a mesh using the revolve tool. In the top view it looks OK.
In the front view I can see that it automatically entered the twisted border to the top of the plate/ Our relief is also built on this same plane. I selected the mesh and nudged it to where I wanted it using the up arrow key.
Then I selected the relief and the mesh to light up the merge tool. I then selected merge highest to merge it to the relief. The mesh can then be deleted.
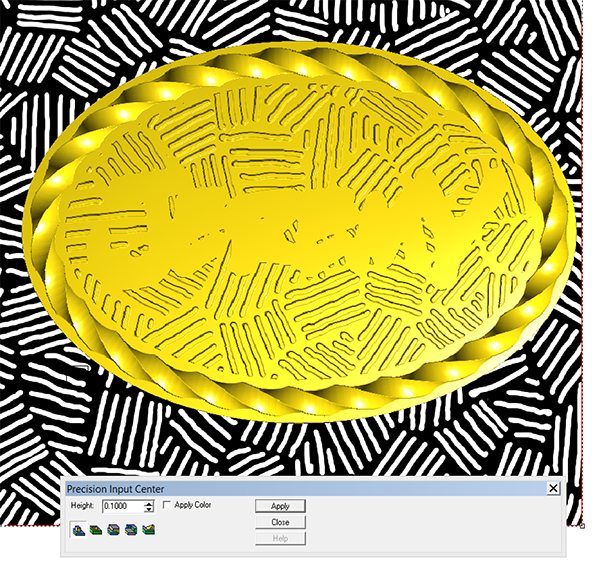
At this point I decided I wanted texture behind the lettering so I added another oval vector (using my favourite offset tool) I then imported the mesh, resized it so my bit would fit in between the lines. I ten selected the oval base relief, the oval vector, the lettering outline vectors and the bitmap to allow me to open the texture dialogue box.
I then raised the lettering outline by modifying the base relief. Please note that the screen capture says 1.5″ and I quickly changed this to 0.15″.
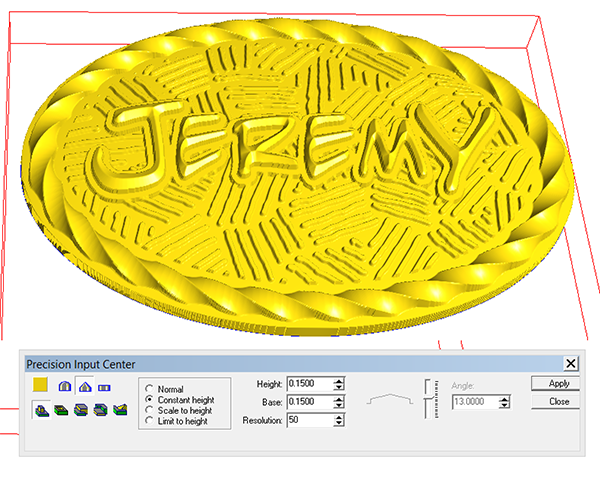
The last step was to add the raised lettering. Since the twisted border and the background were angular I decided that prismatic lettering would be best suited.
Then it was time to tool path the piece and send it to the MultiCam. I used a 3/8 ball nose with a 50% overlap but to rough it out and then 1/8″ ball nose and an 80% overlap for the final pass.


