The mechanical circus animal cars all shared the same routing file. I would sculpt the animal features on later by hand.
The routing files were created in EnRoute using the drawing tools.
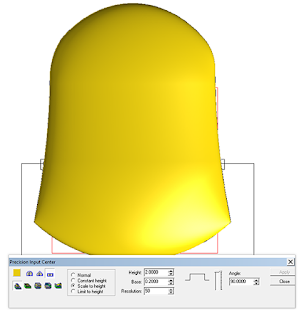
I used the dome tool to create the first relief which formed the car body.
I then created a zero height relief which will be used to trim off the extra on the bottom of the car body.
I did the trimming by selecting the body relief and then merging lowest with the zero height relief.
I then used the slice tool to get rid of the lower part.
I then created two new reliefs – one for the deck of the train car and one the lower part under it. These new reliefs were combined with the body relief.
I then duplicated the new combined relief so I could make a front (with a door) and back (with a window) of the car.
I drew the vectors for the window including the bars in the window.
Using the warp tool I bent them inwards.
Too make the window I created a flat relief.
I then modified this relief by using the dome tool to make the bars.
I then merged LOWEST to sink the window into the car.
The easiest way to create the wheels was so do the various components as separate reliefs. I started with the wheels. I first created a flat relief using the outermost circle. This formed the flange of the train wheel.
This relief was then modified by raising the centre portion to form the tire of the wheel.
I then dressed the centre using the subtract command.
The mounting bracket was created as a flat relief.
The mounting flange and gussets were next, also created as flat reliefs.
The journal box was next – also as a flat relief. The star was added by modifying this relief.
All of these components were then MERGED HGHEST to create the wheel sets on the cars.
While I did the car concepts with the doors open I decided it would be much easier to build the models with a rollup door (in the closed position. They were pretty easy to build and add to the car. The key was to do things in the right order.
First I created a flat relief of the door. This relief was then modified using the dome tool to add the round ridges to the front.
The door jambs and eyebrow were created as separate reliefs.
Because the door was lower than the body of the car but higher than the chassis I MERGED the reliefs using the REPLACE function.
The door jambs, floor and eyebrow were MERGED HIGHEST with the car relief.
This made the car ready to route.
Published with permission from precisionboard.blogspot.com. Source.


