Coastal Enterprises, manufacturers of Precision Board HDU, is proud to announce a series of guest blogs written by Dan Sawatzky of Imagination Corporation, which will be posted on the Precision Board Blog each month. This month Dan Sawatzky gives us a look into how he incorporates sturdy welded steel armature into his laminated Precision Board signs.
In Dan’s own words…
For the third year in a row we are designing and fabricating a bunch of dimensional signs for a great customer in Nebraska. This sign is for a pizza restaurant on the property, named after a granddaughter Zoe.
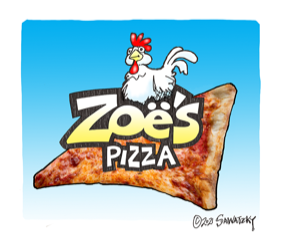
The client has a small pizza place attached to a much larger building. Guests were walking by the eating establishment and not even seeing it. We proposed a solution of adding an extended roof that jutted out into the walkway with a giant sign on top announcing the eatery. The pizza slice points towards the building. Since the large building housed a chicken-themed play area, a chicken on top of the sign was a given.
The client loved the concept.

Next up was a discussion about colour. This quick concept solved that.

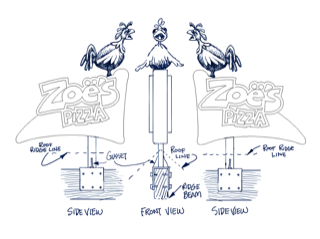
Since the large and heavy sign was going on the top of a porch roof on the ridge line, we needed a sturdy single support which would anchor to the beam at the top of the roof. The point of the pizza acts as an arrow that points towards the building. Since the sign is double sided we decided to point the chicken towards the walkway to be seen from either side as you approach it.
Since the sign measured about six feet long and four feet high, the bracket needed to be sturdy. 1/4” wall 2” x 4” steel square tubing handled that job nicely. The bracket that bolts to the beam measures 16” x 8” and fastens with six bolts going through the beam.

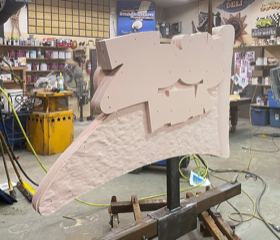
We routed the sign from two layers of 2” thick PBLT-30 Precision Board on each side, plus a 2″ layer in the middle. Here’s one side (two layers) fresh off the router.

We then welded up a sturdy steel frame. The upright is 1/4” wall 2” x 4” square tube. The horizontal pieces are 2” x 2” x 1” square tubing. The pipe on the end will hold the rooster. In this shot I have fitted one piece of the centre layer into place.

And here’s the second layer in place, ready for the next layers to be glued on each side.

We then glued the next layer in place. We used the PB Fast Set and wood screws to hold everything securely, and countersunk the screws and left them in place for extra peace of mind over the long haul.

And here’s a shot of the other side.

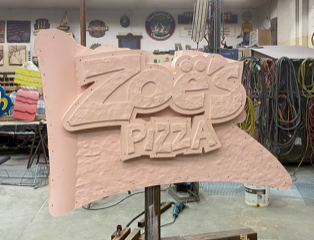
Then it was a simple matter of adding the top lettering layers onto the sign. These were screwed and glued.

Check back soon for the finished sign!