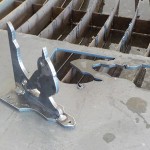
When we installed our MultiCam CNC plasma cutter last week we weren’t sure exactly what we would do with it. We just knew the things that are now possible in our shop will be very cool and unlimited in scope. It was the same with the MultiCam CNC router ten years ago. Today Peter designed the brackets for the gutters they will install on their house. The image was drawn by hand and then imported into EnRoute for vector tracing which only took a second
Dan Sawatzky’s Blog
Dino comes to life
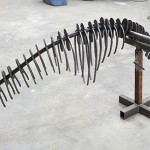
The dinosaur bones were slipped over a bent steel pipe to form the backbone of the velociraptor. I spaced then out and took a look to see how it would work. It needed a little tweaking and twisting to get things looking right. To give the skeleton more life I cut both ends of the pipe and added more bend before welding them back on at a slightly different angle.
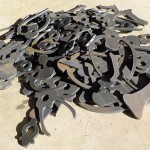
Pile of bones!
Once we got the new MultiCam plasma cutter set up and tested it was time to give it a spin. Russell asked me for a file and I was happy to oblige. It was time for Phoebe’s mailbox to be cut at last! It was pure magic to watch it run through the file! It ran flawlessly – right out of the box! We had quite the pile of pieces when the machine was done.
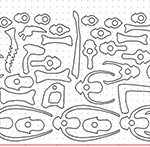
Digging up some old bones
Yesterday, Russel Boudria, the head trainer from MultiCam in Texas arrived to set up our shiny new CNC plasma cutter and train us how to use it. He was eager to get started even though he had spent most of the day in transit. That’s dedication! We worked a couple of hours levelling the table, sorting out wires, hoses and cables, and testing things out. We got to the point where we could move the gantry and test fire the machine. Tomorrow we’ll begin some serious cutting
Complex robot arm – part two
Now it is time to move on to the brush and pedestal of the robot arm. We use the create mesh/revolve tool for this operation. Open the dialogue box and simply follow the steps to create the mesh. I entered 100 for the values in the stacks and slices – this creates the resolution (number of facets) of the mesh. As always it is important to do a render (in multiple views) to make sure that what happened was what you wanted.
Complex robot arm – part one
One of the projects I’ll be sharing at the workshop is a fancy name plaque I did a couple of years ago for Jeff Hartman, one of the authors of EnRoute software. Their company is called Artistic Automation and so this seemed like a fitting idea. The projects used a bunch of the wonderful features of EnRoute Pro. The vectors were all created using the draw tools in EnRoute
House number
As we were renovating Peter and Hailey’s house they decided they wanted a little different approach to the house number on the outside. The house was built in the 60’s and at the start was very plain and basic. With the addition of the fancy porch, wide overhangs, large timbers and custom hand sculpted rock work it is really becoming a showpiece these days. The number is small in this picture and is partially hidden by Peter. They hand sculpted the rock work along the bottom third of the wall
The magic of color!
The name plaques are amazing as dimensional pieces, fresh off the MultiCam but as we apply the paint, glazes and gilding they become spectacular. Becke did the bulk of the painting on this year’s workshop plaques and after so many years of applying her magic touch she has become a master carts man at the task. I’ll briefly describe the techniques she used for each attendees plaque. All plaques first got a hand brushed Coastal Enterprises waterbed primer hand brushed on to achieve a subtle texture coat
Slicing a relief
Slicing is really simple once you understand what is happening and how it works. Getting there was confusing to me but then again I have to bumble through something a few times to get a handle on it. The six foot tall spark plug was almost nine inches deep and our material was only two inches thick. Hence the need to slice.


