Coastal Enterprises, manufacturers of Precision Board HDU, is proud to announce a series of guest blogs written by Dan Sawatzky of Imagination Corporation, which will be posted on the Precision Board Blog each month. This month Dan Sawatzky shows us how he used their rotary CNC machine to route some faux statues from Precision Board HDU and walks us through making adjustments to get the best final product. These statues will be part of the themed decorations at The Hazelnut Inn next door to Imagination Corporation’s studio.
In Dan’s own words…
We’ve had our rotary CNC MultiCam router since late in 2013. When we first took delivery of the wonderful machine we did a few projects with it but the task of programming the machine was cumbersome (for me) because it involved writing some G-code to run on the router. It was much too complex for my artistic brain – especially since I only used it occasionally. After those first few test projects the router hasn’t been used.
Thankfully, since that time, the good folks at EnRoute software have made things a whole lot simpler. Our good friend Jeff Hartman, one of the program’s authors, came up for our last workshop a couple of weeks ago and stayed afterwards for a couple of days for some one-on-one training with the new and improved software. By the time he left we felt confident we could put our rotary CNC to good use.
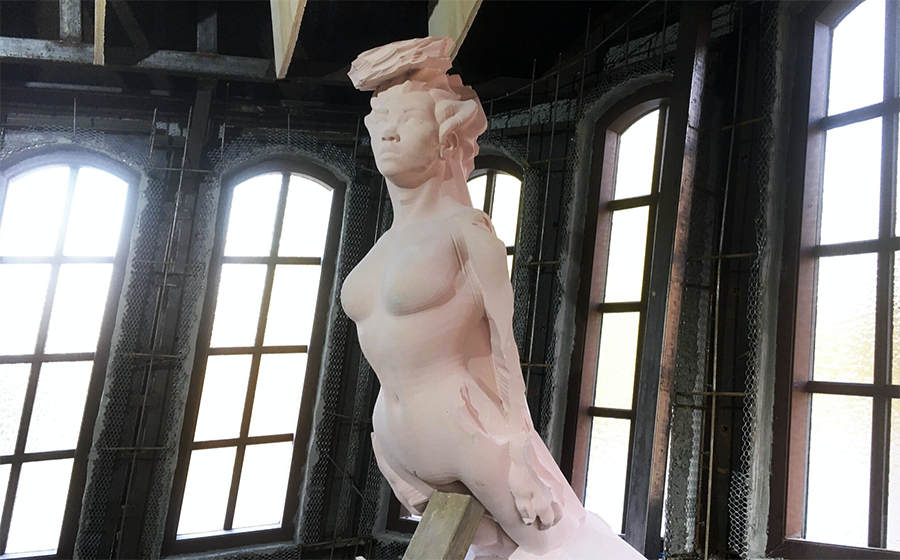
Being Sawatzkys, we jumped right into the deep end, of course. Peter has been itching to start work on the two ship figureheads that are to be mounted over the bed in the North Star suite of the Hazelnut Inn. He downloaded a customized STL file of a figure which would be the starting point for the figureheads. Two mirror images will be created, and once he adds the final details, they will be differently-clothed sisters.
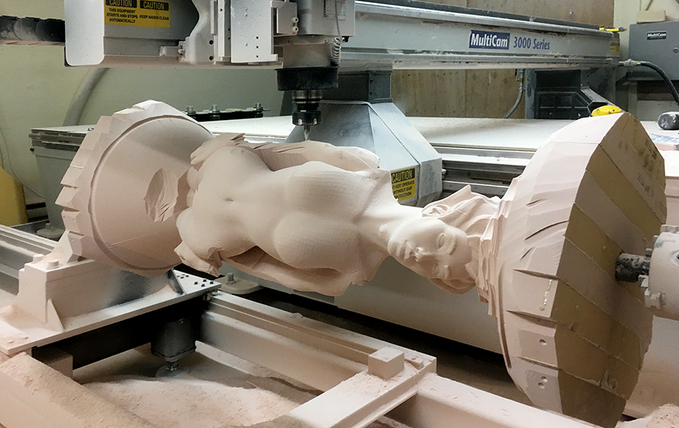
Peter laminated up two massive blocks of PBLT-30 Precision Board, two feet in diameter and five feet long. It took the considerable effort of four of our crew to lug the blocks into the router room and chuck them into the router. Then it was the moment of truth…
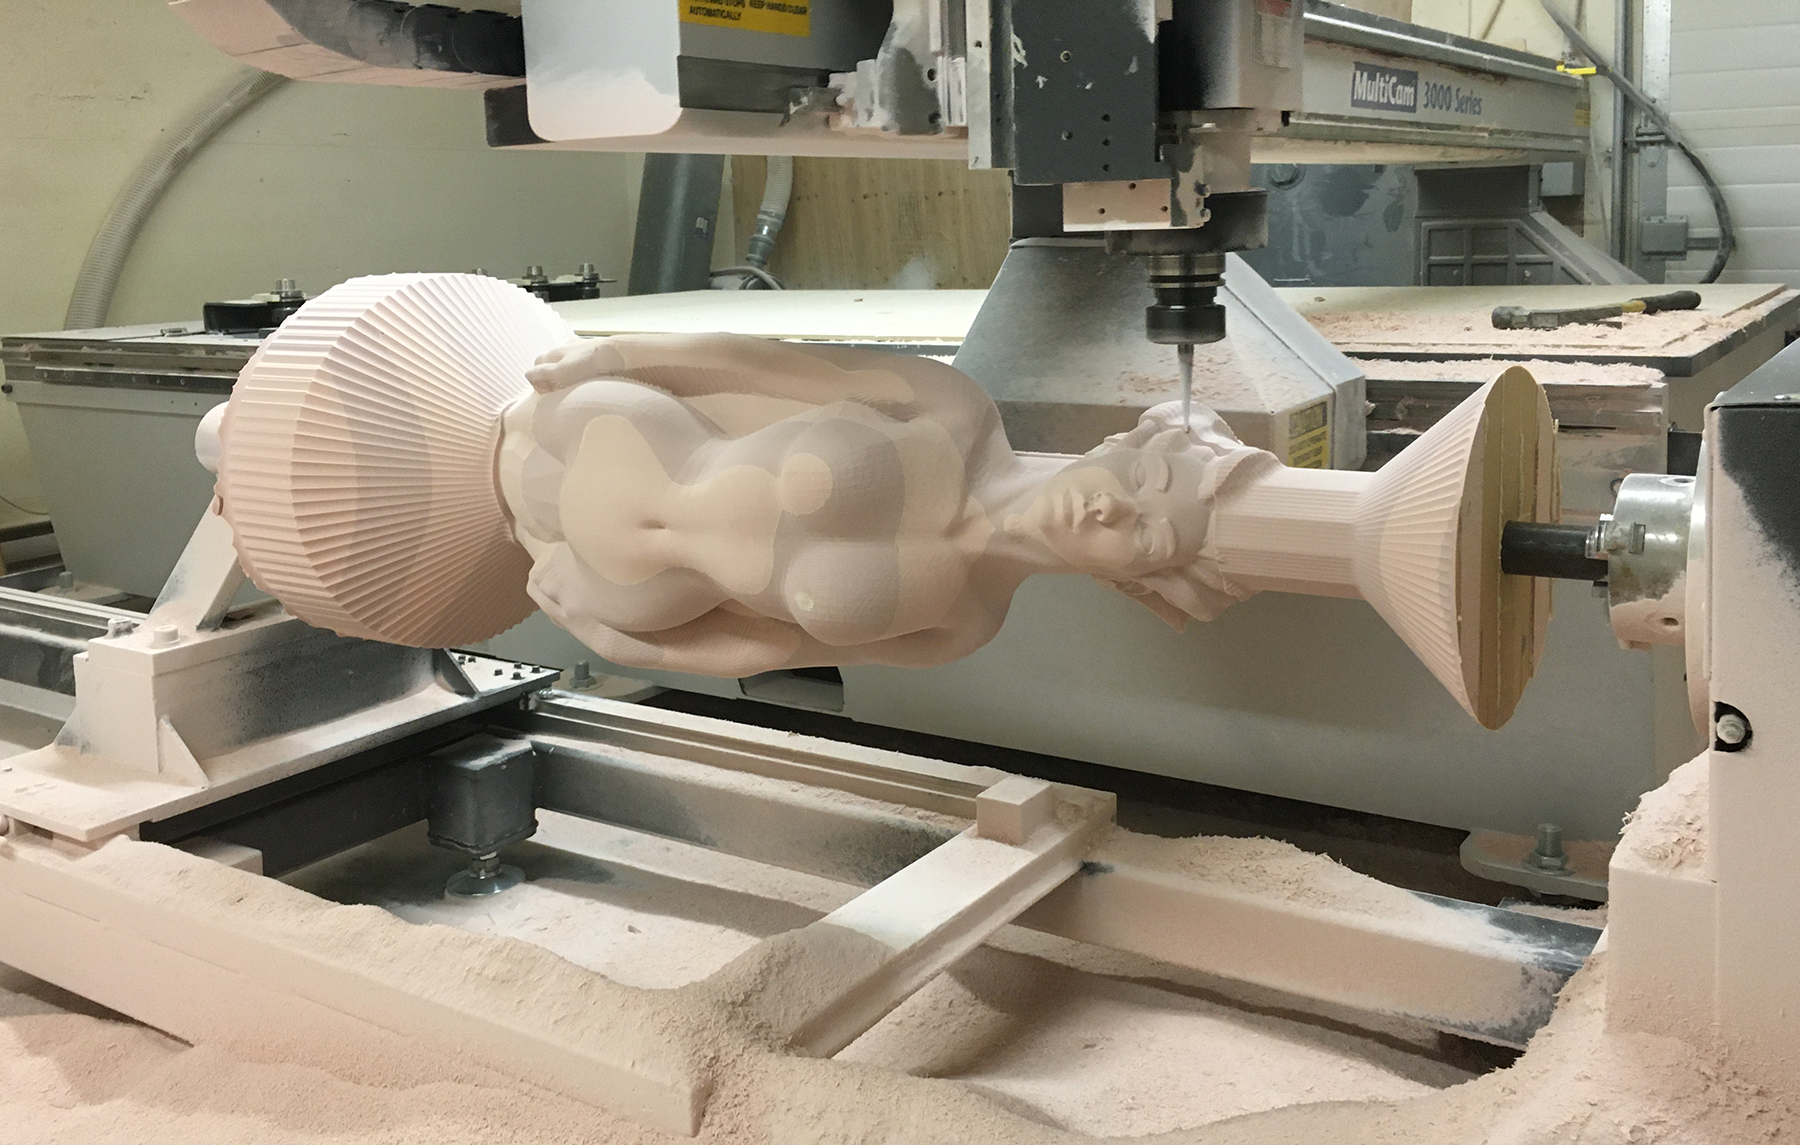
We knew we would have a significant learning curve with this project and so we kept a careful eye on the process, pausing the router to make adjustments by hand as needed. The block was first routed into a perfectly round cylinder, then the actual routing process began – ten passes of one inch each. The first three passes were flawless… and then that pesky ‘CONE OF DEATH’ reared its head. This ‘cone of death’ is determined by the length of the bit and the size of the collet. We were using as long a bit as we possibly could, but because the block was close to the gantry we couldn’t use anything longer. To remedy the situation we brought out the disc sander and air power die grinder. As the collet approached the material we would remove as much as we needed to continue, knowing we would have to add it back in by hand later with sculpting epoxy. Most of the material we removed was towards the rear of the figure which will not be a problem.
The first figure turned out great (for a first effort), but while the machine ran we figured out some quick solutions. As Peter prepared the second mirrored figure he made a few modifications in the EnRoute software. He added some mesh ‘balloons’ to fill the problem areas, primarily between the arms and body as well as between the legs. These areas will be covered with clothing when he hand sculpts in any case. We also increased the size of the bit and decreased the overlap on the rough passes. This cut our routing time substantially. The second figure routing went immeasurably better and we only had to remove a touch of material using the hand grinder to make room for the collet. The finish pass cleaned things up nicely.
On the second figure we were also relaxed enough to grab some video for the blog. We hope you find it as exciting as we did.
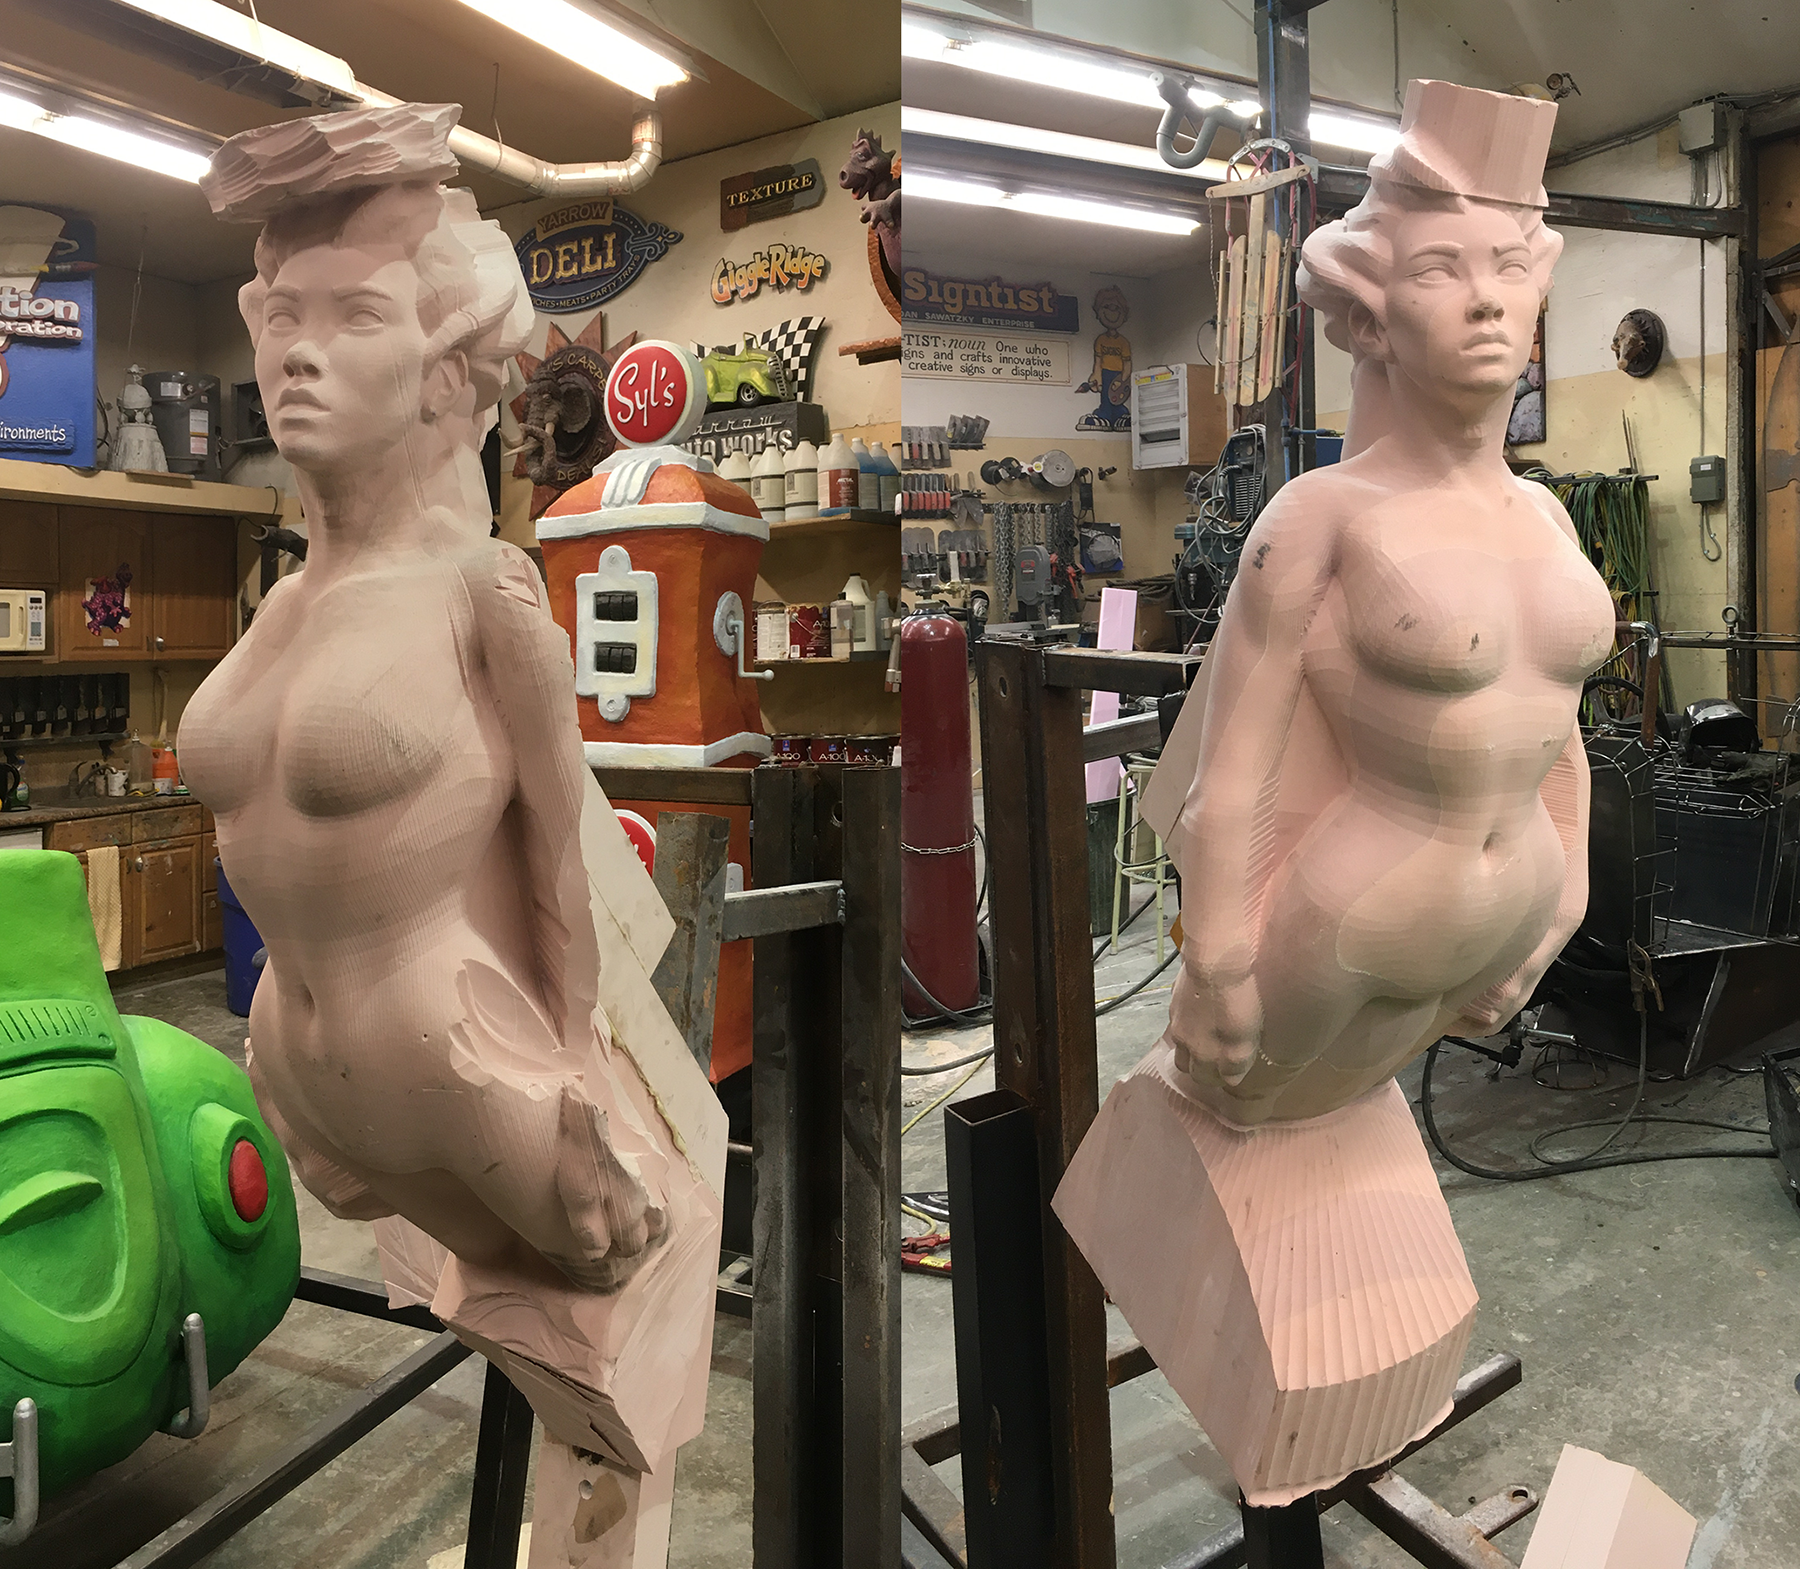
The figure on the left is the first one and the grinding efforts to remove material to make room for the CNC collet are visible on the backs of the arms and hips. These areas will be filled in later by hand using sculpting epoxy. The second figure after digital modification needed almost no hand adjusting. Both figures will receive a thin layer of sculpting epoxy to add details, woodgrain and clothing to make them look like weathered, hand rotary-crafted figureheads of old.
You can bet we are busy dreaming up more projects to rout using this exciting rotary CNC tool!
Sawatzky’s Imagination Corporation is a small family company that specializes in the design and creation of dimensional signs and environments. They tackle projects of any size from small signs to entire theme parks. Their work has garnered numerous national and international awards.
Dan Sawatzky is best described as a creative force and visual storyteller extraordinaire. His art career spans almost fifty years of magic. Dan’s passion is to design and create imaginative places that take people from the normal world to a setting of delight and wonder.
Coastal Enterprises manufactures Precision Board HDU, a versatile, cost-effective and eco-friendly urethane sign material that is particularly effective for making professional-looking indoor and outdoor dimensional signs. It is a closed-cell rigid substrate that does not rot, warp or crack. You can request free samples, get a quote or sign up for periodic newsletters packed with helpful information.


