
Blogs
Building the vehicles – part four
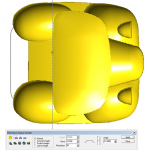
When we left off the vehicle was looking pretty good but now it was time to start in on the customization to make four different vehicles. The vehicles would be a pickup, a long flatbed truck and a short flatbed cab over. Behind the bar were three round corner rectangles. I selected them and made them into a 1″ tall relief.

Building a 1930’s vehicle
One of the things I love about EnRoute is how I can combine all kinds of shapes to form anything I can imagine. Sometimes it is a matter of adding things together and sometimes it is about taking things away. By changing things up just a little I can modify the shapes and change them at will to make something different. On the vehicles I started with the headlights. The first step was a simple oval using the dome tool
Building the vehicles – part three
One of the things I love about EnRoute is how I can combine all kinds of shapes to form anything I can imagine. Sometimes it is a matter of adding things together and sometimes it is about taking things away. By changing things up just a little I can modify the shapes and change them at will to make something different. On the vehicles I started with the headlights.

Building the vehicles – part two
The bodies of the car were both a great deal of fun and also very challenging. I had to imagine all of the different shaped building blocks which would form the various body panels. I first created the vectors for half of the vehicles, duplicated, flipped and aligned before combining them. In the first screen capture we see the front and rear fenders, the passenger cab and the hood of the little truck The square shape will form the box of the pickup. The outside oval , which is the chassis base was only used to guide my sizing of the vehicle

Building the vehicles – part one
The Sign Challenge sculpture will have five hover vehicles circling around a central rocket. I built some common part files and then modified them to make each vehicle unique. I began by drawing up the concept art for two of the vehicles. The file was built entirely in EnRoute. I built the vectors and then the reliefs as individual pieces, and then nudged them up or down in the front view to make everything work
Anchoring the Dinosaur
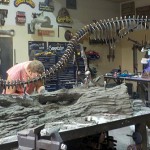
The plasma cut dinosaur is definitely a bit top heavy. We needed him to be somewhat movable and thus a sturdy (and heavy) base was required. We decided he would be perched on a well weathered log made from concrete. Matt had been bringing in some pretty cool samples of gnarly wood which would serve as the perfect inspiration.
Pirate train model
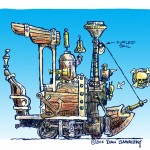
We are building a pirate train for Scallywag Bay. We have partnered with one of the best train builders in the world for the project. Hillcrest Shops, from California is building the chassis of the engine and rail cars. It all started with a concept drawing.
Starting the color
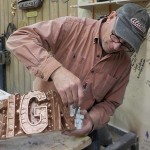
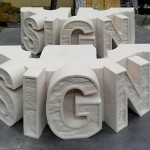
Before I could do the final assembly of the ‘SIGN’ letters and the rounded top of the planet I needed to do the painting and gilding. It would be impossible to do once they are in place. I started with two coats of plain copper metallic over the entire letters and background. I allowed things to dry in-between coats. Then I did a blend coat of black cherry on the bottom, through copper and into a metallic orange on the upper portions.
Assembling the sign planet
It’s not often we do simple cutouts with a fair amount of assembly in our shop but because this is a detailed display piece that will live out it’s life indoors I tackled things a little different this time. The ‘sign’ portion of the sign will be fastened to the top of the lid, and then turned upside down and slipped inside for transport. The lid has a raised oval which will house the transformer for the LED lights. The plasma cut ‘steel ODYSSEY’ letters were positioned and welded to this raised oval. The letters are simple cutouts with a dropped center