Coastal Enterprises, manufacturers of Precision Board HDU, is proud to announce a series of guest blogs written by Dan Sawatzky of Imagination Corporation, which will be posted on the Precision Board Blog each month. In this month’s entry, Dan Sawatzky talks about how to get curved shapes out of Precision Board HDU PBLT-30 for their Hazelnut Inn project.
One of the many creative things you can do with Precision Board is build curved shapes. Precision Board is created to remain stable and true but there are a few tricks we know how to make do wonderfully whimsical shapes if the need is there. This isn’t included in the direction manual. 🙂
A current project called for us to do exactly that. We needed a curved scroll to fasten onto the back transom of a full-sized sailing ship. We knew from past experience just what to do.
I first put a straight edge across the curved hull of the ship and measured the length across, then the distance our straight edge was from the surface on both ends. We determined the curve to be just over three and a half inches high in the middle over a fifty-eight-inch length.
I then designed the scroll in EnRoute, complete with lettering. I made three layers of scroll files. The top two layers were the same save for the lettering in the top layer. The bottom layer of the scroll was slightly different as it had the ribbon tails as well. I would create the curved folds by hand later to keep things simple.
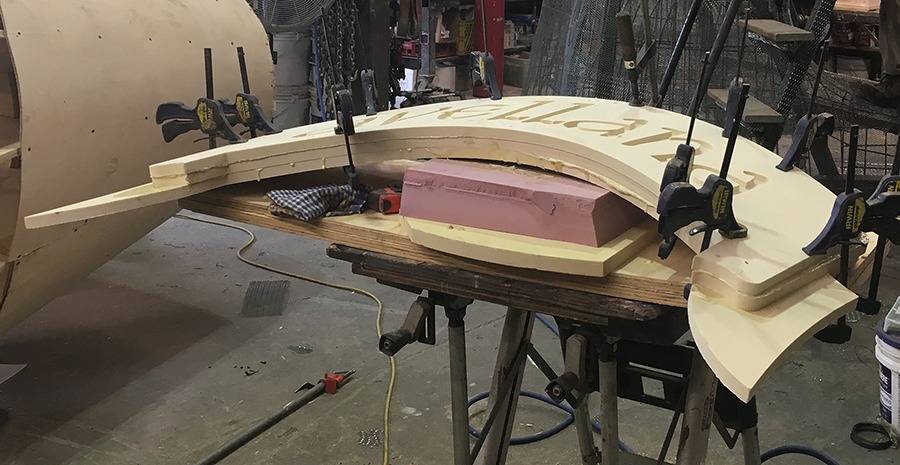
I spread Coastal Enterprises’ PB Fast Set adhesive between the layers and the aligned the pieces. I put a couple of screws through the center to stop things from sliding out of alignment. Then I bent the 3/4” thick layers over a 4” block (to give me a four-inch-thick center high point) and started clamping things down on the ends.
I hadn’t bothered to calculate how much the pieces would stagger at the end because of the different radius of the layered curves. There was a little misalignment on the ends, but this didn’t bother me as I was going to straighten things out when I did the carving. The important thing at this stage was to get the layers tight together. I used both screws and clamps.
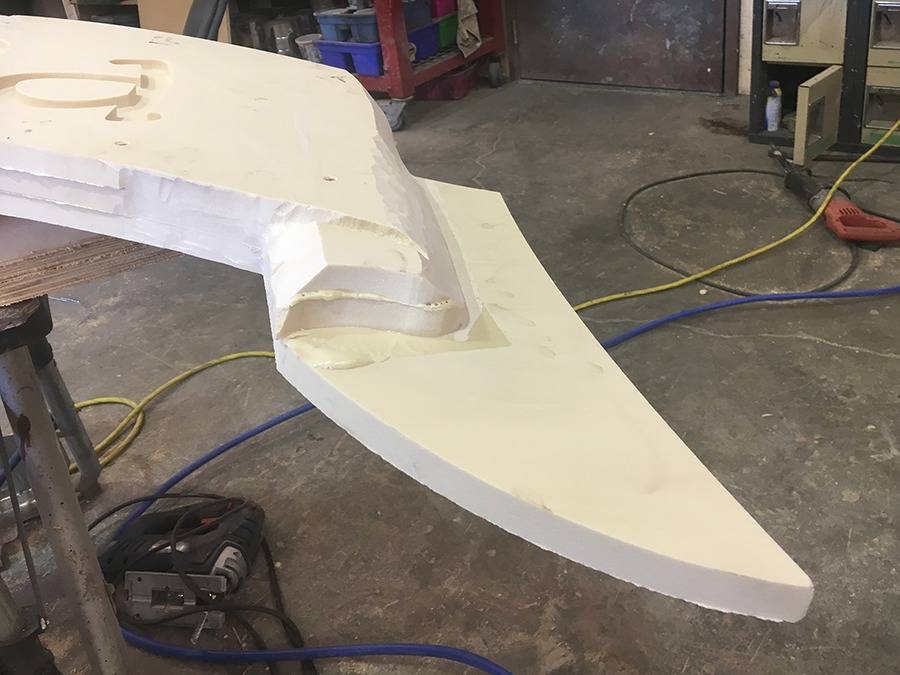
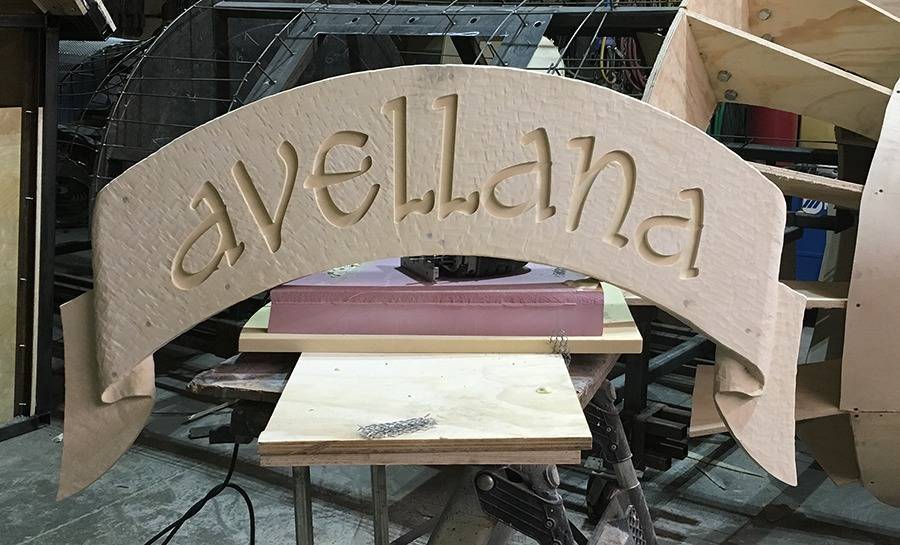
Once things had dried I unclamped the formed scroll. It relaxed just a bit as I knew it would from experience. The scroll fit perfectly on the back of the ship on trial. Then it was time for a little hand sculpting with the air powered die grinder. This is quick work, even on the tough 30 lb Precision Board. I first rounded the ends and formed the looped fabric folds on the end. Then I went over the entire surface, purposely leaving a consistent but random texture, making it look hand-carved in the process.
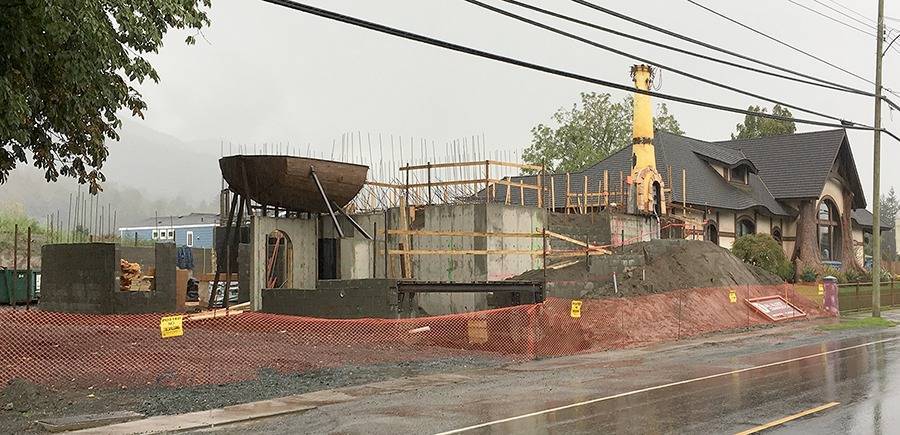
As we developed the plans we did the concept drawing for Hazelnut Inn. The old sailing ship will protrude out of the side of the tower. To keep with the theme, we named the ship the ‘AVELLANA’ which just happens to translate from Spanish to Hazel Nut.
With the plans in hand it was first time to build the scale model. We took the time to add a lot of detail for it was a quick way to work out all the issues we would be dealing with at full size. That has proved to be a good investment as we refer to it often!
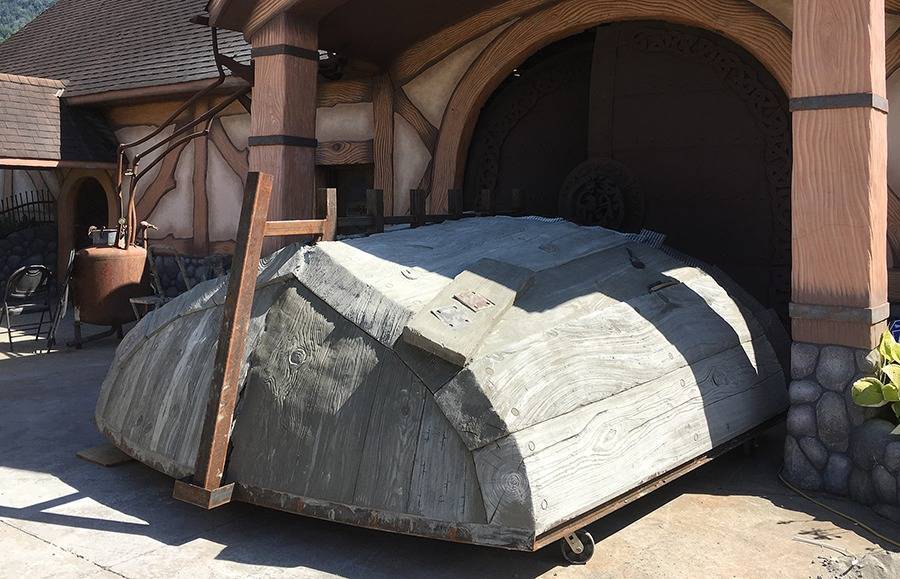
We are prefabricating all we can in the comfort of the shop and at ground level. We began with the hull of the ship. Making it upside down was the easiest way to do it. We would turn it over with the help of a giant crane later.
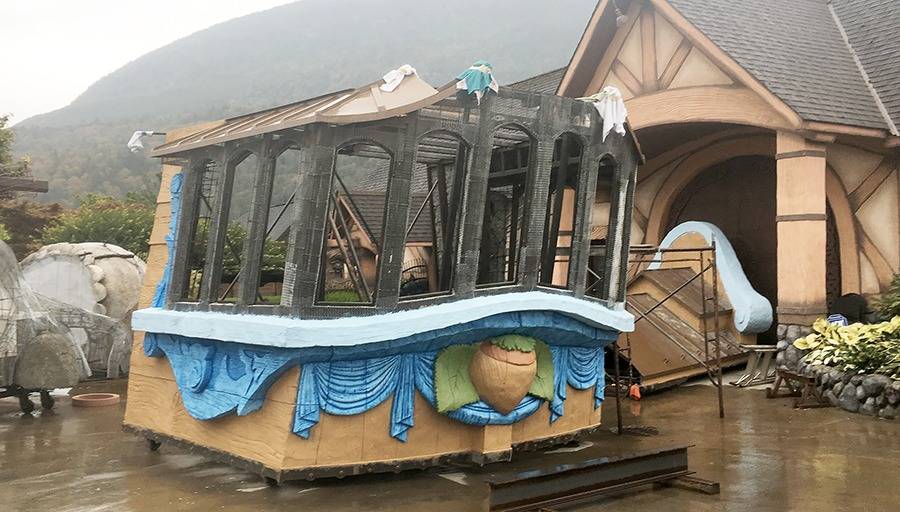
The ship’s cabin was the next stage. We first welded up a structural steel frame and then a sub-frame of pencil rod. Galvanized mesh was next. We then troweled on a thick coat of fibre-glass reinforced concrete which we hand carved to look like the ship’s timbers.
The ship’s hull was lifted into place first and welded to heavy steel embedded into the cast concrete. The heavy steel braces will be themed to look like heavy timbers which are holding up the ship. The walls will also be covered with theme work to make it look like the concept art.
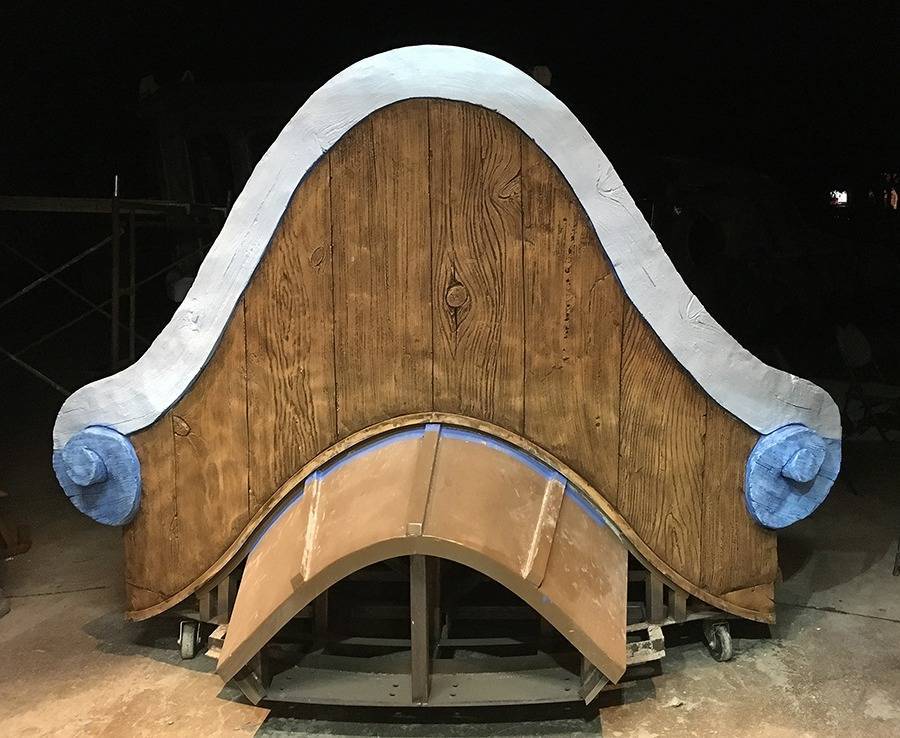
The roof of the ship and top of the stern were built in much the same fashion. This piece is now in the final stages of the painting process. This section is where we needed a dimensional school with the name. This piece was to be built of Precision Board and needed to curve to match the shape of the stern.
These pictures illustrate the clamping process over a block in the center of the scroll. Because we used 3/4” thick Precision Board I could easily curve the pieces as needed. Once glued they retained their shape.
An airpower die grinder makes the shaping of the curved ends an easy task. I purposely added texture as I wanted the piece to look like I hand-carved it when I was done.
The finished scroll fit perfectly on the curved surface of the ship’s transom and it looked like it had been hand-carved, back when the ship was built. Now it was ready for paint!
Sawatzky’s Imagination Corporation is a small family company that specializes in the design and creation of dimensional signs and environments. They tackle projects of any size from small signs to entire theme parks. Their work has garnered numerous national and international awards.
Dan Sawatzky is best described as a creative force and visual storyteller extraordinaire. His art career spans almost fifty years of magic. Dan’s passion is to design and create imaginative places that take people from the normal world to a setting of delight and wonder.
Coastal Enterprises manufactures Precision Board HDU, a versatile, cost-effective and eco-friendly urethane sign material that is particularly effective for making professional-looking indoor and outdoor dimensional signs. It is a closed-cell rigid substrate that does not rot, warp or crack. You can request free samples, get a quote or sign up for periodic newsletters packed with helpful information.
