Generally most sign shops don’t worry much about the back side of signs that they make. At most the back side might get a coat of primer and occasionally a matching color to the front. We take a different approach.
Dan Sawatzky’s Blog
Eureka!
Quite some time ago I started a sample sign project. Here’s the link. But then we got busy. It has sat in the corner gathering dust ever since. But good ideas can’t stay dormant forever.
Painting techniques and tricks
When I design and route our projects I always have our painting process in mind from the very start. By far the single most labor intensive part of our projects is the paint. For starters we brush paint our pieces rather than spraying.
Painting process
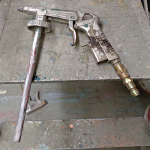
The painting of our signs and features almost always follows the same steps and order. If we decide to prime the 30 lb Precision Board it is because the want to add a little more texture. The 30 lb board doesn’t need primer to fill the pinholes or roughness normally found in lighter densities. We use the FSC-88WB primer made by Coastal Enterprises, the same folks that make the board. While most shops use primer to smooth out the work and sand it to make sure we use the heavy bodied primer to ADD texture.
Ready to roll
With a large crew both in the shop and up at the worksite much of my days are spent organizing and helping crew. In between I spend a few minutes at a time doing the projects I need to do. It took me two days to complete the hand carving of the woodgrain on the wagon wheel sign. I used an air powered die grinder to remove the excess glue, get rid of the uneven edges and carve in the heavy woodgrain.
Big sculpting day
This week has been a busy one. Today I finally got a little time to put the finishing touches to the beaver sculpt. He looks pretty cool swinging in the center of the circle. Tomorrow we’ll begin the painting process.
Routing a rock
A fellow recently set me a picture and asked me to help him out to create a routing file that looked like a specific type of rock. He sent me a bitmap file that was pretty grainy and in fact looked a bit like he had salt and peppered it. These are things that affect the results I would get but I decided to give the file a whirl to see what I would get. This is the original file I was sent
Wagon wheel sign glued
The wagon wheel sign pieces have gathered dust for almost a month as we were so busy with other things. Today the shop was quiet and I finally got the chance to do some assembling. First I had to create a file and cut the center layer to accommodate the steel frame. This frame would be welded up segments of 5/8″ steel rod and a piece of horizontal 1.5″ square tubing. The slots for the 5/8″ tubing would be cut into the material.
Painting faux granite or concrete
For the big 3D globe logo the client asked to it to look like concrete or granite. There are plenty of ways to do this but the easiest is with paint. The fellow who is making the globe will most likely have the globe hard coated with a bed liner type spray. This will leave a slightly bumpy texture. The piece can then be painted a solid or blended solid color with as many coats as necessary


