
Blogs
Horse head routed
Things were a little crazy in the shop while so much was going on but through it all the MultiCam was busy churning out creative work. I sliced the horse’s head in EnRoute, then tool patched it and sent it off to the MultiCam. It was routed in four layers of 1.5″ 30 lb Precision Board
The Anatomy of a Formula SAE Race Car
The University of Maryland Terps Racing team recently unveiled their brand-new 2012 Formula SAE car. They are looking forward to an upcoming first race, which will be held in Ontario, Canada on May 24th, and is known as Formula North. Over 70 school teams out of 1200...
Mighty Moose sign
The Mighty Moose sign is to be a double sided sign. The owner asked that it be old weathered wood, which suits the theme perfectly. First up we created the lettering
Moose structure
The Mighty Moose Ice Cream sign is coming along nicely.
Worlds Longest Egg Toss: Boilermakers Launch Sputnik Seven
Aeronautical Engineering students at Purdue University were tasked with designing, assembling, and launching a rocket – with an egg inside! Mission success rides on the rocket achieving an altitude of exactly 1,000 ft. above ground level, deploying a parachute and...
Using Rare Earth Magnets to Join Composite Structures
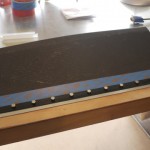
You know what I think is a little silly? Using clecoes to join composite structures. I mean, sure, they work, but unlike when you are working with sheet metal, at the end of it you have a bunch of useless holes that have to get filled in. Also, multiple insertions/removals of the cleco tends to open up the hole, reducing the grip of the cleco. So I started thinking about a better way of doing it, and I think I’ve come up with a workable solution – rare earth magnets. I’ve used them on radio controlled aircraft in the past, and have always been amazed by their small size and large holding power. So, I bought some of these 5/16″X3/16″ N42 disc magnets from K&J Magnetics . On the inside of joggle for the Giles 200 gear leg fairings I put down some electrical tape. I then placed a disc magnet every 1.5″ along the length of the joggle. The fairing half is on a magnetic building board that I use for building balsa model airplanes, this was very handy because it kept all the magnets in place while I laid them out. Tucker and Walnut, faithful four legged shop assistants supervise from below: Okay, really, they’re just watching for that cat that walks by the window from time to time. Anyhow, moving on – I then broke out the hot glue gun, and just surrounded each magnet with a little glue. All we’re going for here is keeping them from falling off the tape once we slide this thing off the table. Then, I simply clamped the two halves together at the edges. After that, I just took one magnet at a time, placed it relatively close to where I thoughts a magnet was. Once I felt it pull, I just let go, and the magnet snapped into place. Well that was easy! The “hole layout” was less time consuming than if I was using drills/clecos, and more tolerant of edge distance. Once I bond these together and the resin has cured I’ll simply slide the exterior magnets off one by one, and then pull off the piece of electrical tape that the interior magnets are glued to. Easy! Obviously, this will only work in non-blind applications, but it sure seems like a nice method to me. If your alignment is super critical, I would still recommend using a few holes/clecoes just to make indexing them together fool proof
HDU Vs. Wood Signs
Why are HDU signs more popular than wood signs? Wooden signs often fall victim to moisture intrusion, which will then cause the sign to swell and the paint to crack. A wooden sign requires much more maintenance, commonly requiring yearly repainting to keep it looking...
More EnRoute 5 fun!
I recently got a job where I had to do some things that previous versions of EnRoute couldn’t handle. My client wanted a horse’s head.
Building a base
Todays project is most likely the simplest I have done on this blog, and yet it made me think, mainly because I don’t do this kind of file very often. I know there are simpler ways to do this job, but I don’t know how to do it. Rather than look it up in the manual I decided to just do it the way I knew it would work.