Blogs

Workshop name plates 2014 – Part seven
For Torey’s name plate I wanted it to look like boards fastened together. I toed out the letters, learned and sized them appropriately then whipped out the rectangles that would become boards. I wasn’t worried about sizes or spacing at this point. I then selected odd number boards and assigned them a height to create the reliefs.
Workshop name plates 2014 – Part six
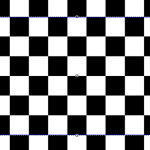
For Richard’s name plaque I wanted a dimensional waving checkered flag. There’s lots of ways to accomplish something like this in EnRoute but this is the easiest I can think of. It used the distort tool. I started with a bitmap from the TEXTURE MAGIC COLLECTION

Photo Booth Wrap – Fizzy Lifting Soda Pop Candy Shop
We’re back at Fizzy Lifting Soda Pop Candy Shop for some more fun work. This time Adam has asked us to design and wrap the photo booth. Here is the finished product!

Rustic Sign – The Catskill Mountain Storehouse
We just had the pleasure of working with Tim Luby at the Catskill Mountain Storehouse for their new retail location. They wanted a simple sign that had a rustic “trail” feel. So we set out to get it done. We cut it out of 18lb Precision Board HDU on our MultiCam 3000 CNC. We’ve cut two panels that we’ll glue together

Workshop nameplates 2014 – Part five
Jim’s nameplate was pretty straightforward save for one detail. I wanted the background texture to poke through the lettering border and into the lettering. I also wanted it to perfectly match what was around. Once again how and the order we do things in was the key. As always I started with the vectors
Workshop nameplates 2014 – Part four
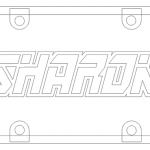
Each name plaque offers a unique challenge and is a great exercise to learn or review a tack in EnRoute. For some, like Sharon’s it meant doing things in a particular order. As always I started with the vectors I needed. To combine the riveted tabs with the rectangle, the quickest and easiest way was to remove the lettering and then use the jigsaw tool to create a new vector. I then deleted the original tabs and border.

Workshop nameplates 2014 – Part three
Jack’s name plate was a classic style combining wood with a riveted border. I started with a formal cartoon font to which I added my raised trademark border which will set the lettering off the background. The border was the first to be created as a separate relief. I used the dome tool.

Workshop nameplates 2014 – Part two
Designing, routing and painting name plates is a wonderful exercise in many ways. The first few are pretty easy. We all have ideas in our heads. But with with each workshop (times two) there are often more than went name plaques to create. All need to be different

Workshop nameplates – 2114 – part one
This year’s workshops are now just over three week’s away and that means we have to begin serious work to make them the very best ever. As always, the work begins with the design of the name plaques for our guests. Some use techniques that are familiar , and some will use new techniques. As we get into the painting of them we will explore new techniques and also use them to train our painters in our advanced painting methods. The first name plaque is a lot like the file I did for the last sign we made last week but we’ll add some hand sculpting to make it very special for Philip – a returning guest from Australia.