Blogs
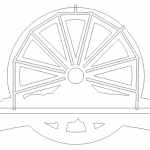
Wagon wheel sign glued
The wagon wheel sign pieces have gathered dust for almost a month as we were so busy with other things. Today the shop was quiet and I finally got the chance to do some assembling. First I had to create a file and cut the center layer to accommodate the steel frame. This frame would be welded up segments of 5/8″ steel rod and a piece of horizontal 1.5″ square tubing. The slots for the 5/8″ tubing would be cut into the material.
Painting faux granite or concrete
For the big 3D globe logo the client asked to it to look like concrete or granite. There are plenty of ways to do this but the easiest is with paint. The fellow who is making the globe will most likely have the globe hard coated with a bed liner type spray. This will leave a slightly bumpy texture. The piece can then be painted a solid or blended solid color with as many coats as necessary
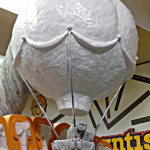
Double sign tree complete
The double sign tree took a while to do because the sculpting and painting were fit around the many other projects underway in the shop. Jenessa did the sculpting and painting on the balloon sign and did a great job too! Amazingly, this was only the second sculpture she has done. Hailey called first dibs on painting the carousel horse. Every color got three coats – all hand painted. That’s a lot of skilled cutting! The horse turned out great! Once the signs and tree were all painted up they looked pretty cool! The piece will go outside next week, ready for delivery and installation right after New Years.
UCSD Human Powered Submarine Takes The Plunge
UCSD ASME students took the plunge with their Human Powered Submarine, "Legasea", at the 12th International Submarine Races in Bethesda, MD, this past June. The event was held at the Carderock Division of the Naval Surface Warfare Center in the David Taylor Model...
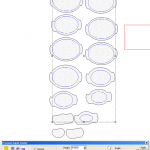
Slicing and dicing (Creating a 3D logo PART TWO)
With the relief creed and sliced it was time to hollow out each section. It’s not hard but it does have to be done in a particular order. First I created an oval inside each section, making sure the border width took into account the slope of the side of the piece. I did this by selecting the new oval vector and then hitting render what I could see the slopes as they related to the size of the oval. I then selected all of the oval vectors and made them into zero height reliefs
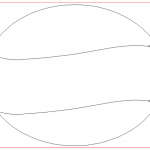
Creating a 3D sphere logo with a banner wrap (PART ONE)
I often get asked to create routing files for other shops. It’s not a job I want to do. But from time to time the project offered is something that intrigues me.
Precision Board HDU: Meeting Green Signage Standards
Did you know that because Precision Board Plus is certified green, and assists in meeting LEED requirements for obtaining USGBC and ICC 700-2008 building credits? Today's architects and business/housing planners place a strong focus on the environmental impact,...
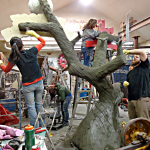
Putting a skin on the tree
With the routed signs securely mounted to the tree and the armature all prepared, today was the time to begin the application of the fiberglass reinforced concrete. It was carefully layered on and then allowed to set until it was perfect for carving. Then our skilled carvers began their work of transforming it into a gnarly and twisted tree.
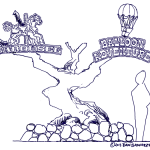
Mounting the signs to the tree
In a previous post I showed how I added the steel structure into the routed horse. Two 5/8″ thick steel rods protruded out of the back. These would then be welded into the sculpted tree structure making for a very strong but almost invisible mount for the signs. Here’s the concept drawing used to sell the idea to the client.