Blogs
Soggy success
Today dawned cool and very wet. And it rained harder as the day went on. Even so, today was the day we would install the Lark Rise sign.
Looking for a FAST-CURING adhesive?
Are you in the market for a fast-curing adhesive to use on high-density urethane, wood, metal or other materials? Coastal Enterprises manufactures PB Fast Set ,an adhesive made for all types of materials. Being remarkably easy to cut, carve and sand, as well as being...
It’s All About The Smaltz
Vital Signs in Verona, WI, is a full-service sign company that specializes in all types of high-quality signage including routed, sandblasted, and “smalted” signs. Adding smaltz to a sign is a very popular texture in the signage industry. This venerable technique...
Creating a fossil with bitmaps
I love working with bitmaps to create textures. For me it is easy to see how the various shades of black white and grey will affect the reliefs inside EnRoute.
Special delivery
Creative doesn’t stop with the fabrication of our signs and projects.
All eyes on Orlando
This week is the International Sign Association show in Orlando. Sadly, I didn’t get to go this year.
ISA 2012- Pictures From Day One!
Check out some pictures from Day One at ISA 2012 in Orlando. Looks like a great turnout this year! Don't forget to stop by booth #2188 to enter our PB Resin contest, check out some Precision Board Plus samples and say hi!
T-Splines Tip – Panel Line Breaks
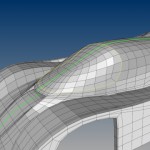
I figured I would do a quick little step by step on making panel line breaks with T-Splines. The first thing is to make sure that you have an isocurve, or isocurve loop that follows the panel line break that you want. This sometimes can be tricky – in the case of this windshield, I did the topology layout with this in mind. Here’s the loop of isocurves that I want to form the break on – it’s the junction between the main body and the front windshield: Now just run tsBevel, the options I use for something like this are: Segments = 5, Positioning = Distance, Keep on Face = Yes, Retopo Snap = No. You’ll need to play around a bit with the bevel distance, in this case I found that 0.09 worked nicely, but you’ll have to adjust it for each model, depending on size. Here’s what you get: Now select the middle face loop , and set your drag mode to UVN: Now just push that face loop inwards using the normal (blue) arrow. I like to do it numerically, so that I can make them consistent. I used a value of -0.05 here, but again you’ll have to play around a bit for each application. Now just run tsMakeUniform. You should do this after every change in topology. In smooth mode you get this: It’s quick, it’s easy and it looks good. Can’t beat that!
Quiet here, busy there
The last two weeks have gone by in a blur. With two different workshops in ten days we’ve put in a tremendous amount of hours, but little actual routing time. This week things will kick back into regular mode
